
Orca Rendering
Ben Gillette · October 11th, 2020
Project Plan
My plan for this project is to model an orca jumping out of the ocean. To reinforce the fact that the orca is in an action pose (one of the requirements for the project) I plan on modeling the water froth by its tail, which can also be used to support the physical 3D model later on. As for what I plan on the model actually looking like, I am going to sculpt it in the position of the picture above, which gives good profiles of the entire side, and the top fin which I can then reflect onto the other side. However, the top picture is still missing two things, 1) a good profile of the two side fins, and 2) an idea of how the orca is colored on the bottom. This is where the below image comes in. With this image, I get an idea of what the side fins look like, and also how I should color the orca's stomach.
I made some modifications from my original plan above for the final project. Instead of the orca partially submerged in the water, I modeled it fully emerged from the water with the ocean receding from where the whale jumped out. This provided an easier 3D printing and modeling process, while still fulfilling the action pose design criterion. Below I will explain how I went about modeling, 3D printing, and rendering this project.
Inspiration Images

Final colored model
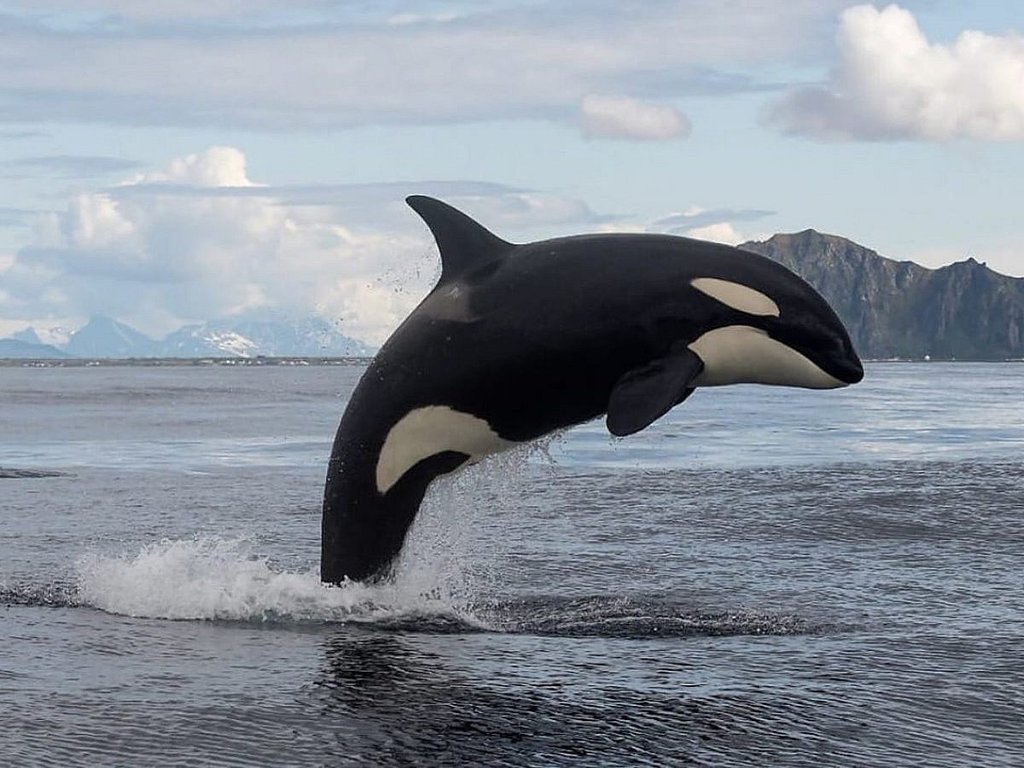

Photo Credit: geoforward.com, earthtouchnews.com
First Attempts

“Rough draft” model
My first step was to just do some quick models to see if I could get a rough shape right, and above is a picture of one of my first attempts at using the form workspace. This was one of my first times using the form workspace for any sort of project, so the main goal of this drafting phase was to get used to using it and see what I could do. This model was created using a single quad-ball shape with length symmetry. From this step, I learned that for editing my main tool was going to be moving faces around until I got the shape right, I also learned that in the next phase I should probably use separate bodies for making the fins and body, as creating all of them from one wasn't going well.
Refining the Profile
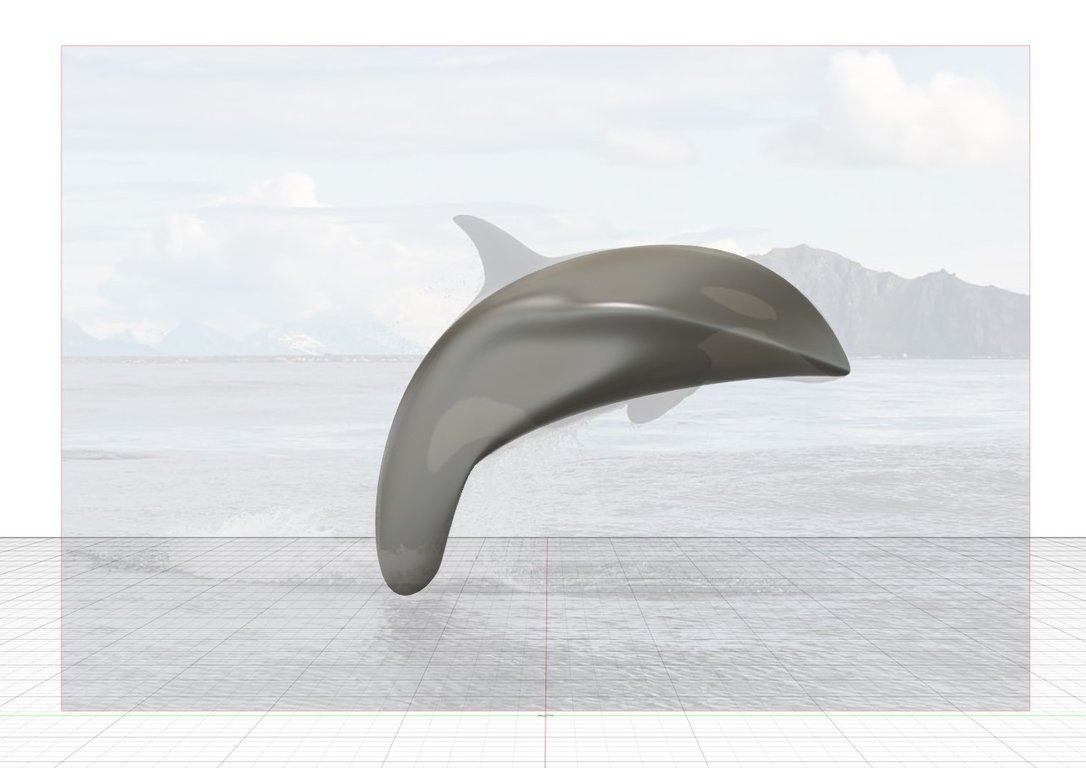
Second draft of the model overlaid on the image I used
After taking a little bit to get used to the new workspace, my next step was to work on a refined model, and from my work in the first drafts, I found that the best first step was to get the outlines of the form matching those of the orca. One of the key parts of this project was pasting images (called canvases in fusion 360) onto the work surface so I could create the most accurate model possible. What you see above is the result of getting the profile view more or less aligned with the canvas. After I got the profile view aligned I could stop worrying about that angle, and focus all my attention on getting the thickness right on the width plane.
Working on the Thickness

After I got the profile into a place I liked, the next step was to make it look less like a flat 2D whale, and give the body some 3D shape. Above is an image of my first width revision, which was really just used to get a starting point for work on the rest of the body. Now that I had a decent model for the body of the orca, that meant that I could start working on the fins, tail, and small details to make everything look better. In addition to adding the tail and fins, I could also stop using the canvas as much for reference, and start focusing more on making the model look good now that I had the shape right.
Top Fin

Separate model of the orca’s top fin
My first step to work on detail was to make the top fin. To start this process I first created a new form body to work with, as I could be much more flexible with my modeling than if I made the fin out of the original body. My process here was fairly simple, just like with the first form I aligned the edges roughly to that of the canvas I was working off of, then I did modifications to the width and thickness to make it look more natural and to make sure the 3D printer would register it as a surface when printing. the final step for this fin was to work with the bottom part where the fin attaches to the main body. My objective here was just to blend the edges as well as I could, which I did by just adding small tweaks to the fin surface here and there until it looked how I wanted.
Side Fins and Mouth Work

The next step in the detailing process was to create the side fins. Again, I used the process I have been using for all the other forms in this project the only difference begin I used a new image (second inspiration image from the beginning) to model the profile. After getting the profile I copied the fin, flipped it, and used it for the other side. as far as positioning I placed one fin close to strait out from the side of the orca, while the other fin is angled slightly down to mimick how the real orca's fins behave in the image. In addition to adding the fins, I started to add a small little lip to the mouth of the orca to add to the realism, as the orca's nose isn't just a flat beak.
Tail and Body Touch-ups

The final step in my detailing process was to add the tail and then do some final editing on the body to get it ready for rendering and printing. For the tail, my workflow was almost the same as with previous forms, however this time I also used width symmetry along with length as the tail has two dimensions of symmetry. After the tail was finished and attached to the orca, I did some small adjustments pulling and pushing out faces and edges on the parts of the whale that looked a little off. The first of these trouble spots was the area under the tail. In early images, you can see this strange indent on the joint between the body and tail as a result of the bend. To fix I pulled out the area that was indented slightly and pushed the points at the tail joint back so that the shape was more natural and rounded. The other big issue I had was a sort of ridge forming from the nose all the way down the side of the body. I tried to minimize this by creating a new edge over the top of the ridge and pushing it inwards which did help but did not completely fix the problem. And the last thing I did some work on at this stage was to bland the mouth a little more to make it slightly more subtle.
Coloring and Texturing

Eye Markings

Eye Markings
Underbelly Markings

One of the biggest problems I had to solve was how I was going to do the coloring and texturing of the model. There are two ways that you can add color in texture, by body, or by face. Because I needed different colors on the same body I had to color and texture by face, so I had to find a way to cut the body face into the shapes of orca markings. My solution was to make a sketch traced against the orca canvas with the 'fit point spline' tool that matched the marking, then extrude the sketch as a surface (extrusion can be seen in the top two images) that intersected the main body. From there I used the spit face tool which created faces matching the markings on the orca. Then all that was left was to fusion's appearance menu to select colors for each face. I used the black skin plastic texture for the black parts on the body, as it had a very similar looking sheen to normal skin when put in the light. For the white markings, I used an ABS white plastic texture which seemed to work well.
3D Printing

Adding water

Fully assembled model
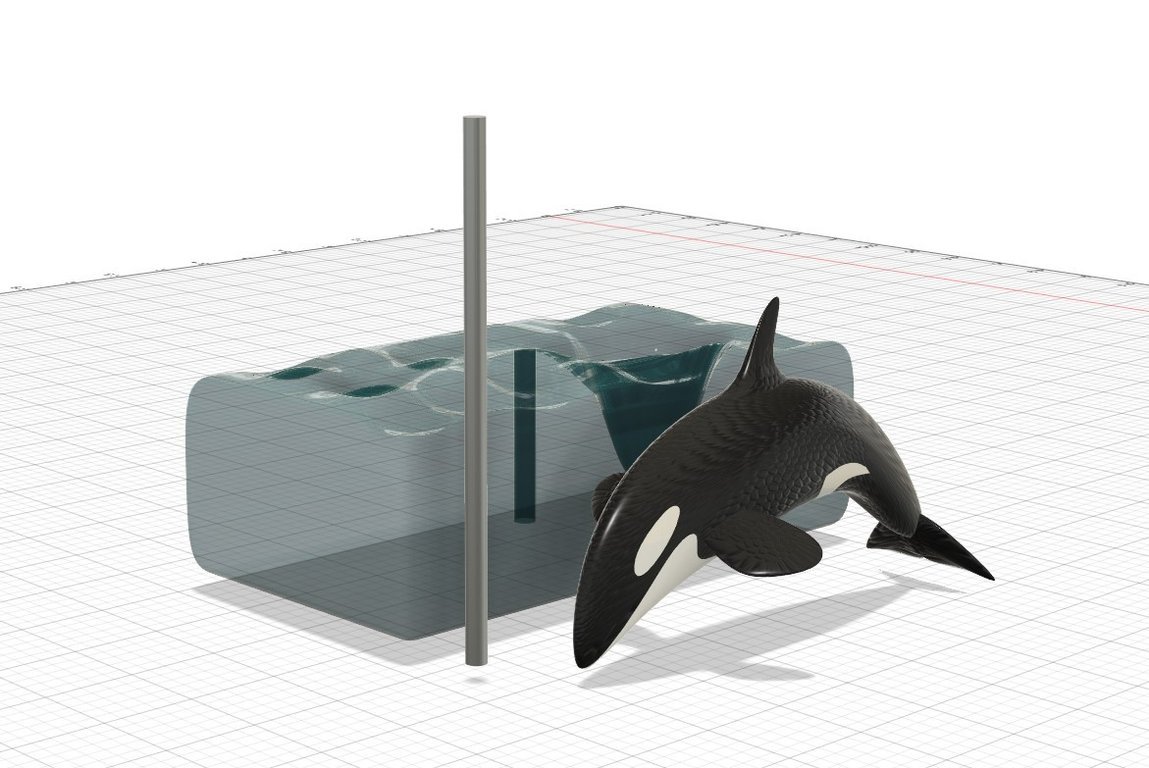


3D printed model and settings
To create a 3D printing model, my first step was to create the ocean water that the orca was jumping out of. For this, I simply made a cube in the form workspace with 20 length faces and 14 width face so I could have small dips and rises to simulate the waves. Then I made a large pit under the tail of the orca to simulate the water receding as it jumped out (all this can be seen in the first image). From there I had to have some sort of column holding the two pieces together, so I made a thin column with a simple sketch and extrude, then made a cut the same size as the support column into the water and orca body where the column could slide in. A very important note here was that I made the column just the slightest bit smaller than the hole so that when everything was printed it would fit together well. And finally, once I had all the bodies created I moved everything onto the work plane and scaled it to the size I wanted to everything would be ready for export to the printer software. For 3D printing, I used my FlashForge Finder and printed each body from the scaled and grounded model separately so I could print the ocean and support column in a different color than the orca, and also prevent filament stringing. I had set a custom first layer height just in general that helped with bed adhesion on my printer, and the infill for all the bodies was 15% to keep things sturdy. The water and support column required no supports or raft, I simply printed them with default settings, however, the orca I printed with the nose and tail touching the ground on a raft with strait supports under the side fins, and some dotted along the underbelly to keep the print from falling over as it printed. I chose to keep the fins on the orca instead of printing them separately as the connection between the fin and body was so small it was more secure to print it connected.
Rendering and Final Words

Render at 44mm focal length and 9.5 EV. HDRI Background courtesy of tutsplus.com
The last part of the project was to render a model complete with an environment surrounding the orca. There are no pre-loaded environments of the ocean in fusion 360, so I found another HDRI file from the internet and used it here (citation in works cited). I tried but could not figure out how to blend some water created as a form into the environment to create the effect of receding water, so it is left out in these renderings. I used the move tool in the options menu to shift the orca up, so the shadow cast would make it look like the orca was above the surface of the water.
I used a fairly consistent process throughout this project, which was to use the move tool to modify faces and edges on forms to create and blend the parts of my orca together, using pictures of real whales as a template. This sort of designing, revising, and refining is used a lot to make a lot of things in the animation or 3D modeling industry. The sort of workflow I used where I made a general shape, then focused on making it look good is the process many artists use for sketches in animation, or how 3D artists make their models.